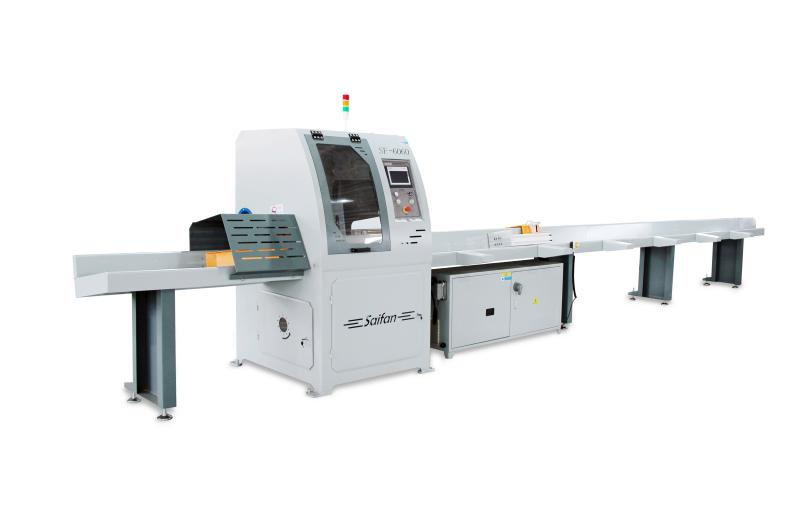
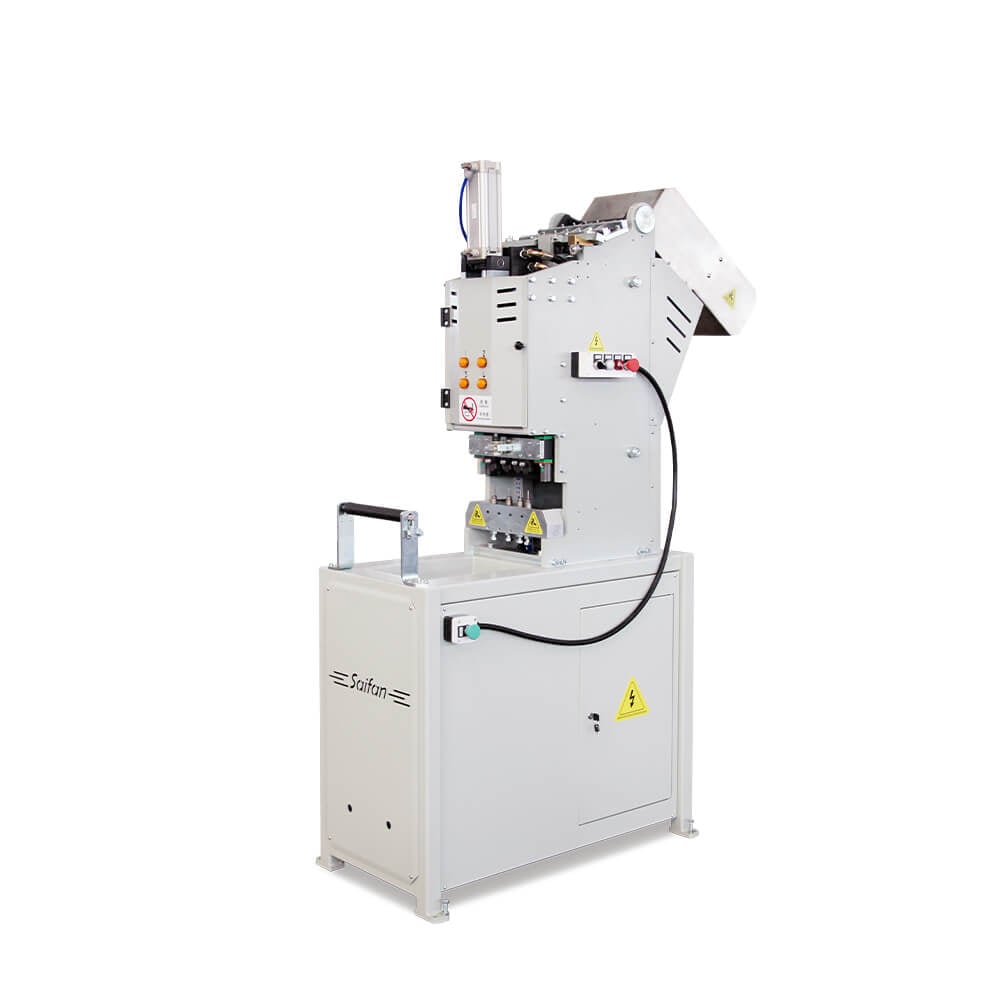
SF6060 is a machine tool with excellent performance and advanced technology. Before operation, the operator must carefully read this instruction manual in order to operate and maintain the machine properly under various working conditions and ensure maximum safety.
I. Safety Precautions
Ensure the machine is properly and effectively grounded.
Personal items may cause serious injury.
Before starting the machine, remove watches, bracelets, rings, and other accessories.
Fasten cuffs tightly, tie up long hair, remove neckties, and do not wear slippers.
Never process workpieces that are too small or too large.
The feeding speed and cutting capacity must be set according to actual conditions.
Do not operate the machine at excessive speed or overload.
Confirm motor rotation direction.
Ensure the motor rotation direction matches the required direction of the machine.
After installing the saw blade, check that it is securely fastened.
Check all safety protection devices.
Make sure all safety guards are properly installed, then close all protective doors.
Safety during cleaning or maintenance.
Before cleaning or maintenance, the machine must be stopped and the power supply disconnected.
Use special warning signs to alert surrounding personnel.
Keep the machine clean.
Regularly clean all working surfaces inside the machine and keep the surrounding floor clean.
This is an important prerequisite for ensuring machining accuracy and extending the service life of the machine.
II. Basic Machine Operation
Install the saw blade
(The saw blade is already installed on new machines.)
Ensure the rotation direction of the saw blade is correct.
Connect the air supply.
Adjust air pressure and power on
Adjust the pressure gauge so that the air pressure meets the required range of the machine.
Turn on the main power control switch.
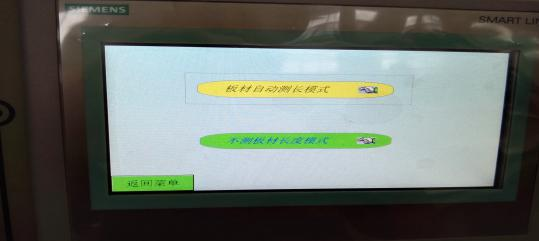
Select the cutting mode.
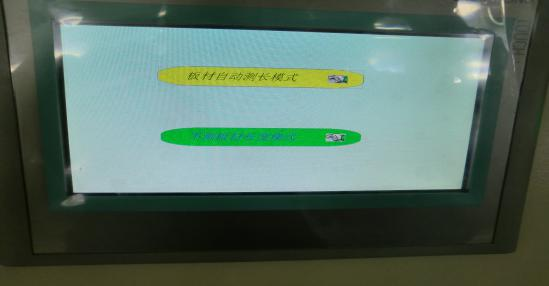
III. Non-Length-Measuring Mode Settings
System homing (return to zero).
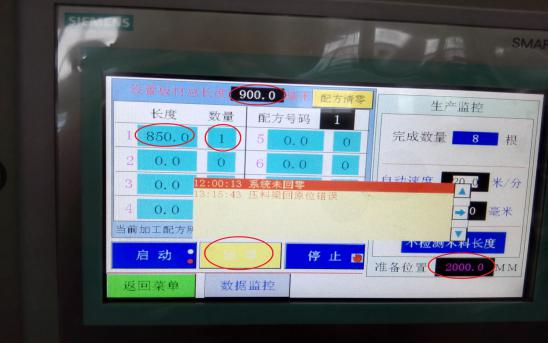
Set the total board length
(Located at the top of the production interface.)
Set the cutting size and quantity, and set the initial cutting length.
Note:
After completing the above settings, a line showing “Actual total processed wood length = ****” will appear below the size and quantity section.
This value must not exceed the total board length.
Set the ready position
Pusher position = required cutting board length + 1 meter.
IV. Automatic Length-Measuring Mode Settings
System homing (return to zero).
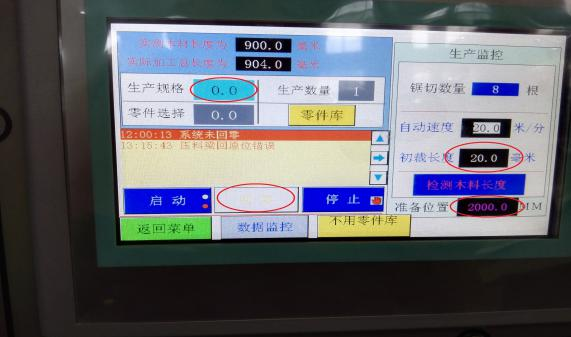
Set the cutting size and the initial cutting length.
Set the ready position
Pusher position = required cutting wood length + 1 meter.
Parts Library (Remaining Material) Settings
After the board is placed, the machine will first cut off the remaining material when it starts.
If the remaining material needs to be reused:
Enter the Parts Library.
Example: if the remaining material is 200 mm and 150 mm is needed, enter 150 mm in the first line of the Parts Library.
Return to the menu.
Click “Not Using Parts Library” at the bottom of the interface.
When it turns red and displays “Using Parts Library,” cutting can begin.
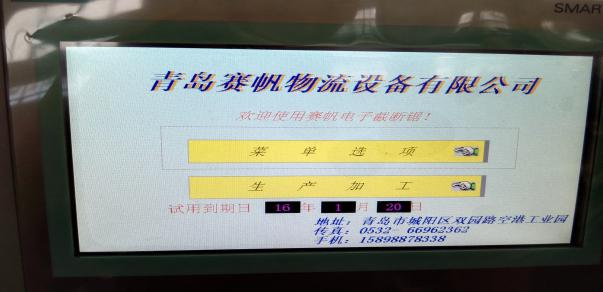
V. Human–Machine Interface (HMI) Description
Startup Interface
Menu Options
Used to switch between different system menus.
|
Production Processing
Used to select production and processing modes.
|
 |
 |
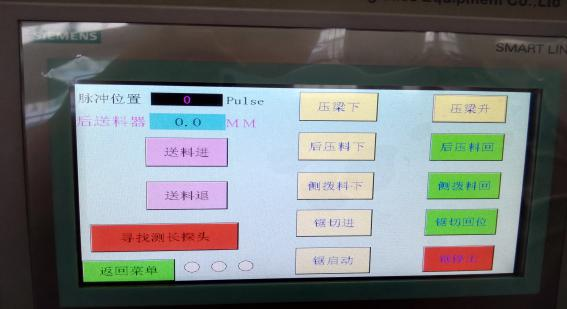
Debug Interface
Allows manual control of the machine when it is in a stopped state.
|
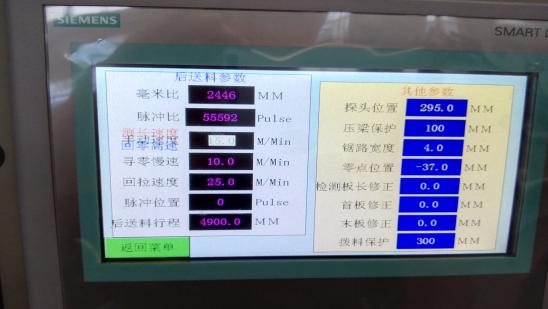
System Parameters
Preset control parameters used during machine commissioning.
|
 |
 |
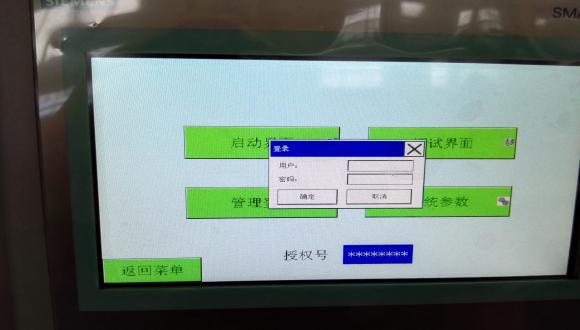
VI. Management Login
Username: SF
Password: 6666
After logging in, the system parameters of the machine can be modified.
Non-professional personnel are advised not to change system parameters to avoid affecting normal operation.


 Hot News